Cookie Consent by FreePrivacyPolicy.com

Pro-Mote

Control multiple GoPro cameras at once

Tutorial Video


Connect cameras

Pairing cameras

As already indicated in the app's onboarding screen, the cameras should have been paired with the iPhone using the original GoPro app before using Pro-Mote. This will ensure that the pairing has been fully completed.
Generally, the pairing can also be done using Pro-Mote, but this way is sometimes more cumbersome and may not be as reliable. Older cameras than the HERO8 Black complete the pairing process via Wifi, for example. When pairing purely via Bluetooth, the camera remains in pairing mode after completion.

Connect cameras in the app

.

When you start the app, it directly starts searching for cameras and connecting them. There may be cameras displayed that are not paired. However, these can not be connected.
The search mode is displayed in the title of the app and the search icon in the upper right corner is turned on. The search mode is automatically turned off after a certain period of time. Both behaviors can be customized in the app's settings.

When cameras are found, they also show the connection status. If the connection has not worked for one or more cameras, then by clicking on the connection icon try to repeat the connection setup.

If not all cameras were found before the search mode was automatically terminated, then you can start the search mode again manually. If the search mode was started manually, then it is not automatically terminated again. One must switch it off also manually again.

Settings

Except for the "Always on" setting, all settings are saved in the app and are thus available even after the app is restarted.
The "Always on" setting is always reset to "off" when the app is closed!

Always on

If the switch is off, iOS will put the app to sleep after a few minutes and the display will go off.
. If the switch is on, then the app and the display remain active.

Connection

With the setting "Connect on startup" you can control whether the app directly after the start activates the search mode and connect to the cameras found. The "Start time" setting determines how long the search mode remains active before it is automatically switched off again. The setting "Timeout" determines after how many seconds the app considers the connection attempt as failed. If by this time the connection has not been established, then it will be displayed as Failed.

Battery

In this section you can specify threshold values from which the battery level indicator will change color. There is one value for orange and one for red.

SD card

In this section you can specify threshold values, from which the display of the storage space on the SD card changes color. There is one value for orange and one for red.

Functions

Pro-Mote supports six elementary functions, and I have divided them into two groups of three functions each. This allows me to limit the display to the primary functions, depending on the available space on the display.
The primary functions include.

Record button

Record

This button is used to start or stop the recording.
The button has two possible states

Record button - off

The camera does not record.
When the button is pressed, the recording is started.

Record button - on

The camera is recording.
When the button is pressed, the recording is stopped.

Highlight tag button

Highlight Tag

This button can be used to set a highlight tag.

Connect button

Connect

With this button, the connection to camera can be established or disconnected. When connecting the camera, this is also started automatically if the Bluetooth module of the camera is active.
. My experience in this regard can be found below in the section "Experiences with the various GoPro models".
The button has four possible states

Connect button - not connected

The camera is not connected. When the button is pressed, an attempt is made to connect to the camera.
The application is trying to connect to the camera.

Connect button - connected

The camera is connected.
When the button is pressed, the connection to the camera is disconnected.

Connect button - connecting

The application is in the process of establishing the connection.

Connect button - timeout

A timeout or an error has occurred during the connection with the camera.
When the button is pressed, the connection is attempted again.

These three functions are actually always needed. But there are also three additional functions, which are mostly needed only once per session or even less frequently.
The additional functions include

Locate button

Locate

This button can be used to locate the camera. A beep signal is triggered at the camera.
The button has two possible states

Locate button - off

The localization function is switched off.
When the button is pressed, the localization of the camera is started.

Locate button - on

The localization function is switched on.
When the button is pressed, the localization of the camera is stopped.

Date and time button

Date and time

This button can be used to set the date and time of the camera with the corresponding data of the smartphone.

Power off button

Power off

This button can be used to turn off the camera.
The button has two possible states

Power off button - on

The camera is switched on.
When the button is pressed, the camera is switched off.

Power off button - off

The camera is switched off.
To turn on the camera, the Connect button can be used.

All functions are available in two different variants. Either they can be called directly for a specific camera, or for all cameras at once.

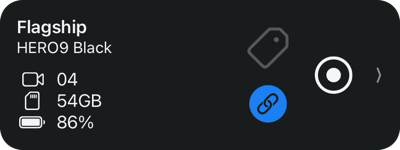
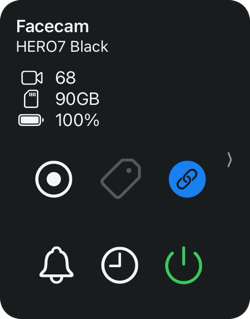
Calling for a specific camera is done using the buttons on the "tile" of the camera. Depending on the available space in the portrait or landscape view, either only the primary functions or all functions are displayed. If only the primary functions are displayed here, you can switch to the camera detail view. All functions are always displayed there.

Camera funktions Camera funktions - landscape

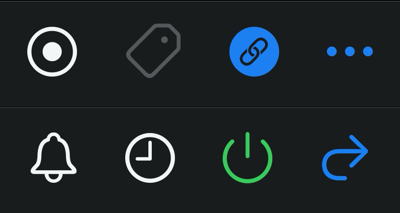
The buttons in the main function bar can be used to control all cameras at once. The primary functions are displayed here by default. The "more" and "back" buttons can be used to switch back and forth between the primary and additional functions.

The main function bar represents the desired state. So if the main function bar shows that is not currently recording, it may of course be that the recording was started at a single camera individually and this is currently recording. However, this is displayed accordingly in the overview. If you press the record button, Pro-Mote tries to start the recording on all cameras. Cameras that are already recording will be skipped. In general, the functions from the main function bar are only applied to the cameras where it makes sense. The goal is that in the end all cameras have the desired status.

The main function bar also tries to pay attention to the individual control of the cameras. For example, if recording is started manually on all cameras, the recording button status in the main toolbar will automatically jump to the "recording" status once all cameras have reported this.

Main function bar

Display

Pro-Mote, of course, faces the same camera control issues as any other remote control. However, Pro-Mote's strength is that it indicates problems that occur relatively clearly.

In general, all indications in Pro-Mote are based on feedback from the connected cameras. For example, the status of the record button is not set to active when the function has been pressed, but only when a corresponding feedback has been received from the camera.

So the first important step is to detect if the connection is established correctly and data is received from the camera. There are basically two types of data received from the camera

  • Information
  • Status updates
The camera information includes, for example, a model description, the camera's serial number, and the firmware version. The status updates include information such as battery level, free memory, and recording status.

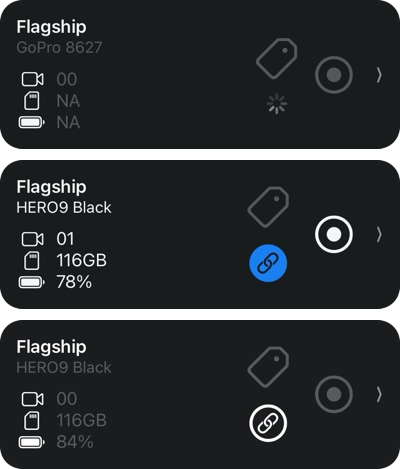
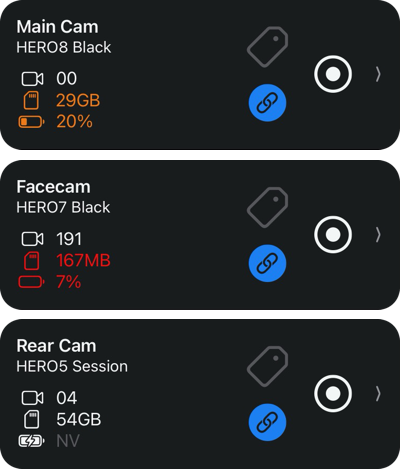
Before the camera is connected, the information is displayed grayed out. The camera description first shows some kind of ID and the status information is NA (Not Available). 
Once the camera is connected, the received data will be displayed in the normal text color.

If the connection to camera is disconnected again, the last received value will remain, but the display will be grayed out again. So you have to be aware that the data may be out of date.

Not all cameras support all data. For a HERO5 Session, for example, no battery level is sent. The display changes here to the normal text color, but the content remains at NA.

If the camera is displayed as Connected, but still not all information is displayed correctly, something may not have worked completely. It is recommended in the case to re-connect. The only case in which it has not worked so far after re-connecting, when the camera indicated a memory card on its own display.

camera information states

The status displays are updated whenever a change in the status is sent. And again, this really only happens when the status has also changed. For example, a battery level update is sent when the level has changed by one percentage point. During recording we get one status update per second, because the recording time changes every second. Because the displays are based on such status updates, actions performed directly on the camera are also displayed. For example, starting and stopping the recording. But also the change of the recording mode.

As mentioned above, the status displays are designed to give an indication of when a closer look is worthwhile or necessary. This is usually done by a colored display. Partly you can influence in the setting when these color changes occur.

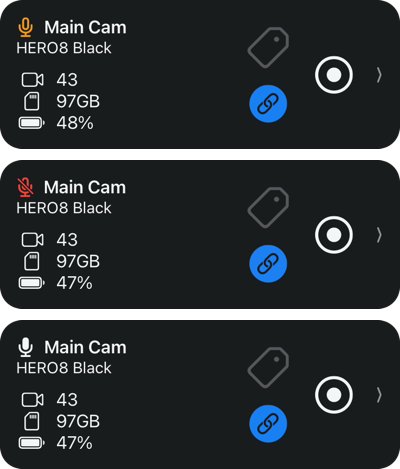
A microphone icon may appear in front of the camera name if either a microphone adapter or media mod is connected to the camera.

An orange, unfilled microphone icon is displayed when a Media Mod is connected but no external microphone is plugged in. Since the media mod has its own built-in microphones, you have sound no matter what. The orange color just indicates that this is coming from the Media Mod's microphones.

A red, unfilled microphone icon is shown when the microphone adapter is connected but no external microphone is plugged in. The red color indicates that we have no sound when recording in this case.

A white filled microphone icon is displayed when the media mod or microphone adapter is connected and an external microphone has been plugged in.

Camera microphone states

The Current mode is indicated by a corresponding icon. Behind it appears either the number of associated recordings, or the current duration of a running recording.

The Free Memory display can be configured with two threshold values. If these threshold values are reached, then the free memory display is shown either in orange or in red.

As with the free memory, the display of the battery charge can also be configured using two threshold values. And also here then the representation takes place in orange or red.

In addition, the icon also tries to provide a status about the state of the battery. In the HERO5 Session, for example, no battery status is sent, but a categorization that is reflected in the battery icon. 
The battery icon also shows whether the camera is charging. It should be noted that a connected power source does not necessarily cause the charging icon. For example, the camera is not being charged while a recording is in progress. The supplied power is used to operate the camera. The battery is not charged, but it is also not discharged any further. Only when the recording is stopped, the camera starts to charge.

Camera Status